 Recently I purchased an Android cell phone. I couldn’t stand any more my old slow windows phone.
Anyway, I really amazed by the Android OS, it’s too…. open source, and that’s the beauty of it. Thousands of developers and their apps, ready to serve you with no cost. Even if you cannot find what you need, it’s quite easy to create your own application by simply use Google’s application called “App Inventor”.The only problem you can face when you use Android or any other modern smart phone OS (iOS, Windows Mobile, etc.) is that you must have internet access over the cell phone network from your provider. That’s to expensive for the moment but almost anywhere there is an open wireless network.
In case you don’t want to spend money (…because you have just spend to much on purchasing your new android powered cell phone) to buy a data connection over the cell phone network but you really like google maps and navigation over them then there is a smart solution.
Downloading Google maps and use them off line is a very easy job, using just two open source applications: Mobile Atlas Creator and Rmaps (Android App).


1. Download the Mobile Atlas Creator application. Install/Unzip it.
2. In order to use the Mobile Atlas Creator extracted maps with Rmaps application you must download the sqlite_jni.dll library and SqliteJDBC. There are two version of the sqlite_jni.dll file, a 32bit and a 64bit version. Use the proper version with your workstation. Put the files in the same folder with the Mobile Atlas Creator application files.
3. Run the Mobile Atlas Creator.exe file with administrator privileges.
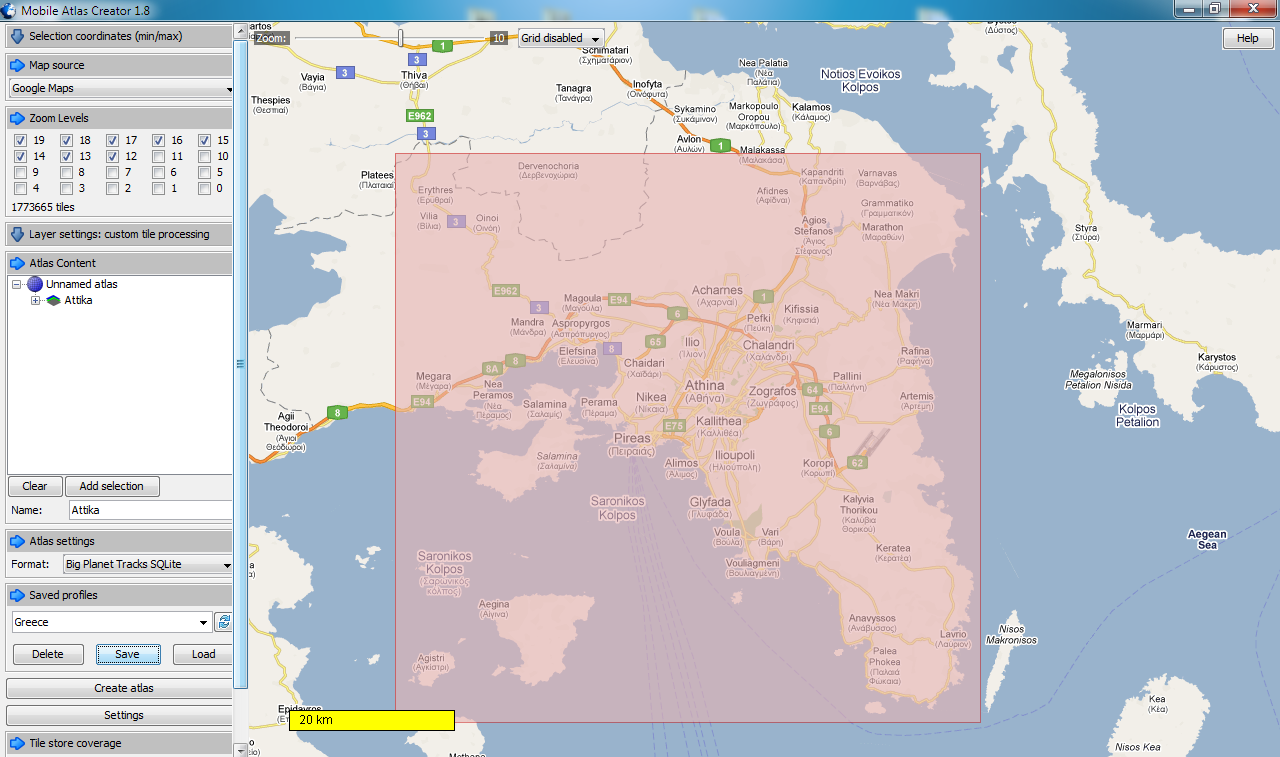
 4. On the left side of the application you can see the “Map Source” panel. Here you can chose the map source. Mobile Atlas Creator application cooperates with plenty of map providers like Microsoft, Yahoo, Google, Open Street Map, Multimap, Openmap, etc. In our case we will select Google Maps. You will notice that at the right panel the familiar Google Maps environment will appear.
5. Use the arrow keys and the mouse to locate the area you want to download. You can zoom in and out in order to be more precise. Using the mouse you can mark the download map area.
6. At the left area you must check in at least one zoom level at the “Zoom Levels” panel. Keep in mind that large number of zoom levels occurs large map files to be downloaded. This can affect the download time and you must also consider your phones sd card free space.
7. At the “Atlas Content” panel. you can name the area you marked at the previous step and push “Add Selection” button. A new level with the name you just entered is added in the content window.
8. You can add as many areas as you like following the steps 5 to 7. Remember that as many levels you add, so much disk space you need.
9. In the “Saved Profiles” panel you can save the profile you just created for future use (add/remove areas).
10. Push the “Settings” button to set some options. Here you can chose if you prefer the metric or the imperial unit system, the download files directory and setup the application how to access the internet if there is a proxy server in your network. Press “OK” to store the changes and close the window.
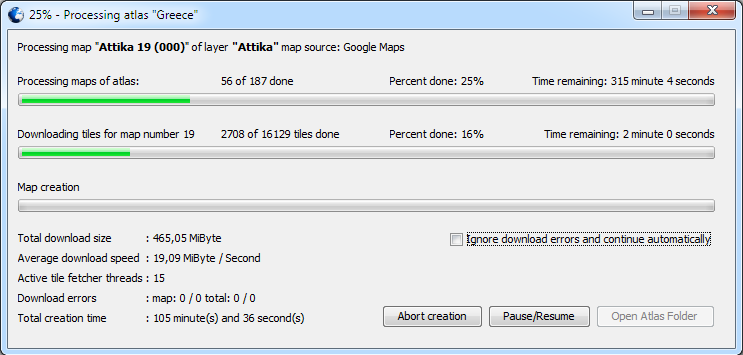
11. Now we are ready to start the downloading procedure. Push “Create Atlas Button” to start downloading the map files. A pop up window will inform you about the download process.
 12. While downloading the maps, you can install Rmaps application. You can search in the Market or scan the following QR for downloading the application. It’s quite easy and quick.
13. When the map download is done, copy the map file which is named something like “bigplanet_maps.sqlitedb” and move it in your phone sd card under the path “/sd card/rmaps/maps/”.
14. Then, the last thing to do is to setup the application to use the downloaded map. Start the app and go to “Settings/User defined maps”. If you followed the previous steps you will see the downloaded map as an option. Select it.
15. From the new menu check the choice “Enebled map” and go back on the app’s initial screen.
16. Then go to “menu/Maps” and select the downloaded map from the list of the available maps to be used on the screen. A window will be appeared and inform you that the app is calculating the min and the max zooming capabilities of your map. This will take some time depending on the size of the map and the produced file.
Well…, that’s it. Now, you can use Google Maps offline and save your bandwidth and your money. Of course you can have more than one downloaded maps on your phone. Just repeat the steps 3-15 and keep different file names for the downloaded maps.
Enjoy….