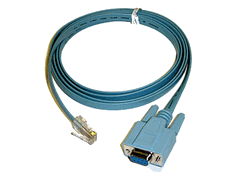
 In order to manage a Cisco router or switch you have to be connected through the console port or through the ip network.
In the case of the initial power up of the device the only available option is to be connected through the console port because there is no layer 3 (IP) configuration on the router yet.
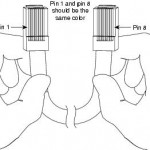
Except the networking device (router/switch) and a workstation (PC/Laptop) we are going to use a console cable or a rollover cable. Actually it’s the same cable with two different names. The first name came from the name of the networking device port on which is connected. The second name came from the cable pin out diagram (look the following table).
| End A pins | End B pins |
| Pin 1 | Pin 8 |
| Pin 2 | Pin 7 |
| Pin 3 | Pin 6 |
| Pin 4 | Pin 5 |
| Pin 5 | Pin 4 |
| Pin 6 | Pin 3 |
| Pin 7 | Pin 2 |
| Pin 8 | Pin 1 |
Usually, one end of the cable is in form of RJ-45 (male) connector and the other is in DB-9 (female) connector. Rarely you can see a RJ-45 to RJ-45 cable. In this case you are should use a DB-9 (female) to RJ-45 (female) connector.
 Normaly, with any Cisco networking device comes a console cable which is a light blue cable with DB-9 and RJ45 connectors ready to be used.
Before you start using it there are some settings you have to make to your PC/Laptop COM port.
- Speed – 9600
- Data Bits – 8
- Parity – none
- Stop bits – 1
- Flow Control – none
If you don’t make this configuartions you will get a lot of errors or you wont even be connected to the device.
For more reading, you can visit Cisco website.

